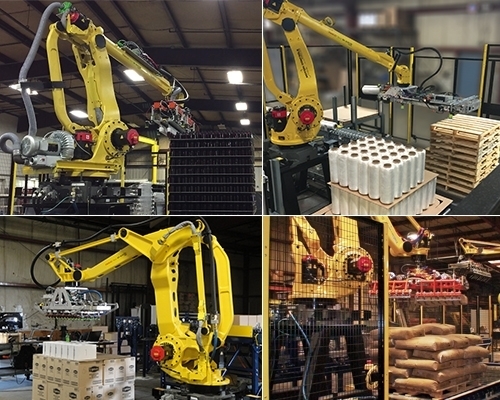
Motion Controls Robotics is having a meetup during this year’s 2018 Pack Expo. During this Meetup we are offering customers a chance to view our facility and watch videos using an Oculus Go VR Headset. We thought we would share what we learned, so that you can also share by using VR with your customers (example 360-degree images are shown at the end of the article).
Would you like to affordably produce 360-degree images for a virtual reality experience that can help you share your manufacturing capabilities in a unique way? As a team, you often visit customers to present your company information and capabilities, and being able to give them a VR experience will make your presentation stand out above the crowd.
Getting Started with VR
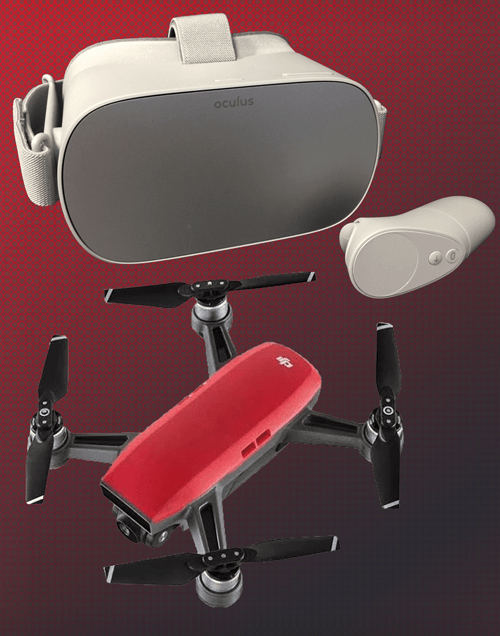
If you want to get started in sharing drone videos from your manufacturing floor and/or VR experiences with 360 images, these are two pieces of equipment that can get you started without too much upfront cost.
- Drone – DJI Spark $450-$500
- VR Headset – Oculus Go – $250
You will also need a cell phone for setup, maintenance, and for the drone, this is your visual interface (the instructions below are for an iPhone but applications can be installed on most phones).
DJI Spark
The DJI Spark is a great starter drone. The upfront cost is reasonable, and the user interface and drone driving is much improved over the DJI Phantom. In a limited environment, like a manufacturing facility, the size of the Spark makes maneuverability pretty easy. I have tried to fly other drones inside and the Spark is by far the best option. The video quality is FHD: 1920×1080 30p and images are 3968×2976. These specs make for great YouTube videos and high quality 360 degree images.
The Oculus Go
If you have not experienced a Virtual Reality headset, you must give it a try. I have yet to find someone that wasn’t awed by the first experience. The Oculus Go also has some fun apps for scaring you and other people you know (and you get to watch). Much like the DJI Spark, the Oculus Go is a great starter headset. It takes 10 minutes to setup, so it is perfect for mobility. You would easily be able to take to a customer location and maybe even purchase enough headsets for everyone to use.
Capturing the 360-Degree Image
So here is the first step in capturing an image of your manufacturing floor, design center, or even an aerial view of the facility. Get your DJI spark ready for flight – the Spark software for your mobile phone offers an option for capturing a 360-degree image.
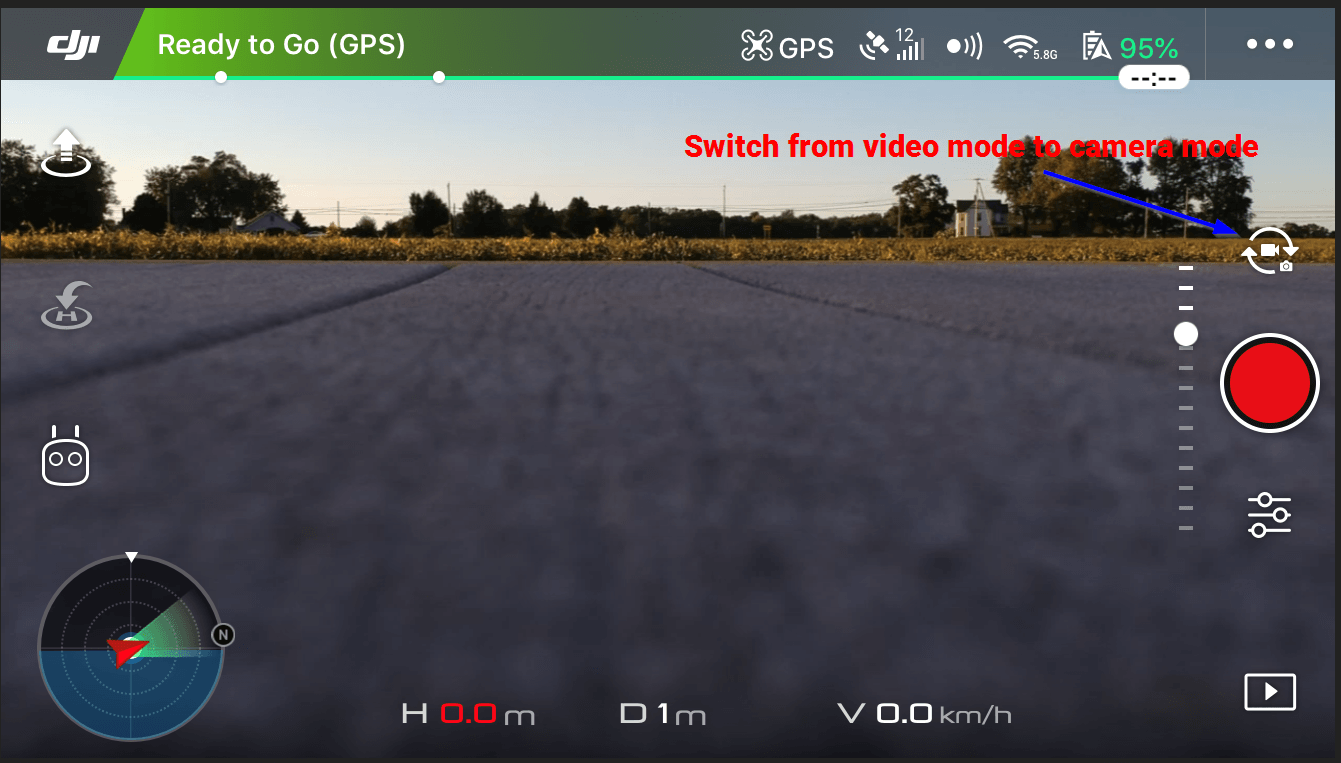
When you run the 360-image program on the DJI Spark, make sure that the battery is fully charged because the process can take about 40% of the battery. On the screen, switch from video mode to image mode. The icon will switch to a camera in the middle and can easily be toggled to video again.
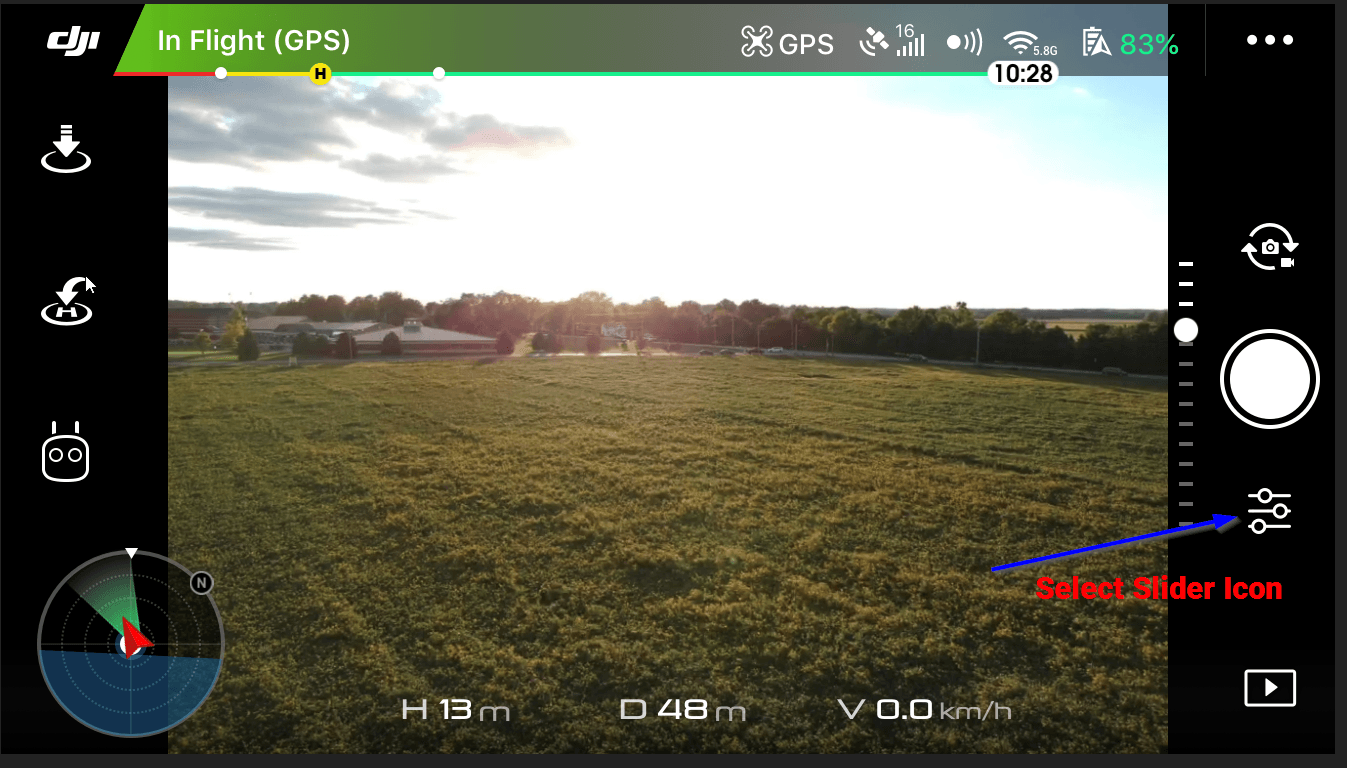
Navigate the drone to the location where you want to capture the 360-image. Manually move the drone around the location to make sure this is the best center point. Next, select the Slider icon on the bottom right of the screen.
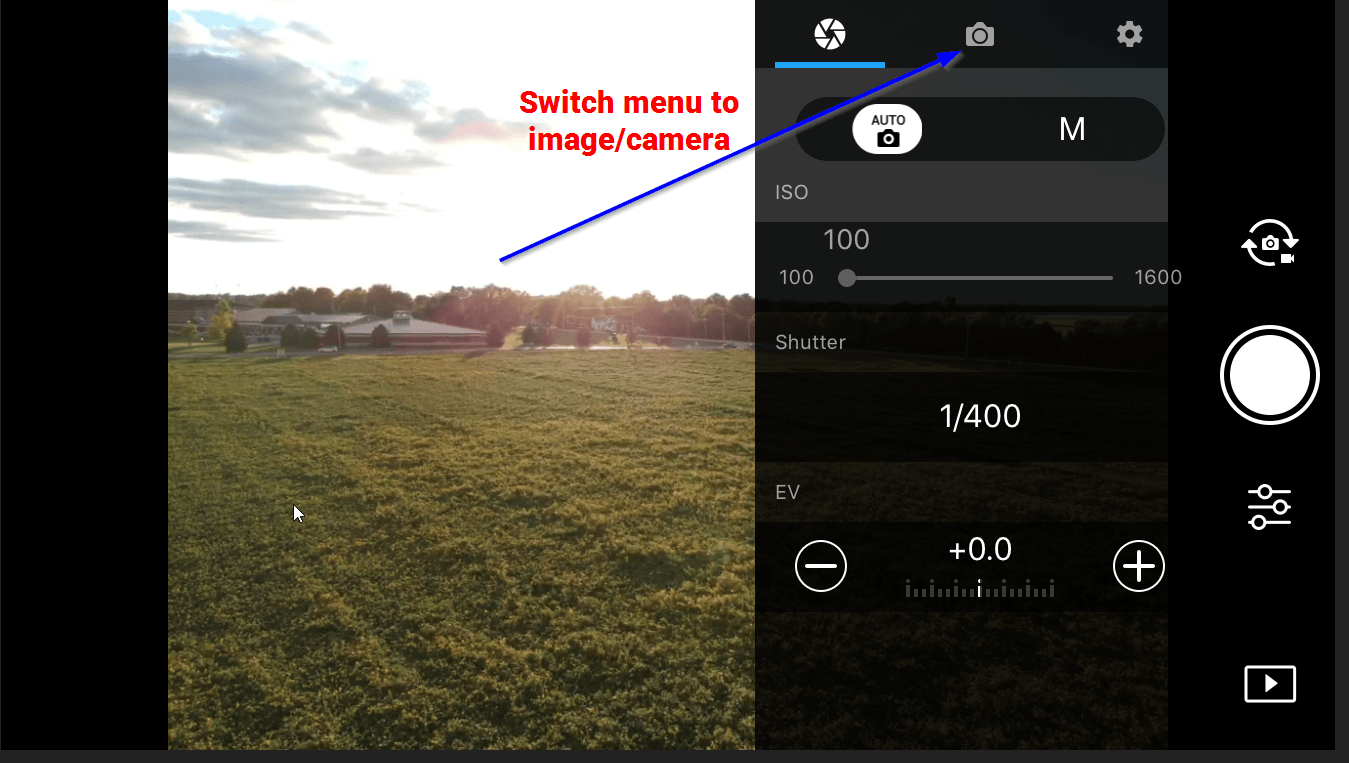
From there switch the menu to image/camera.
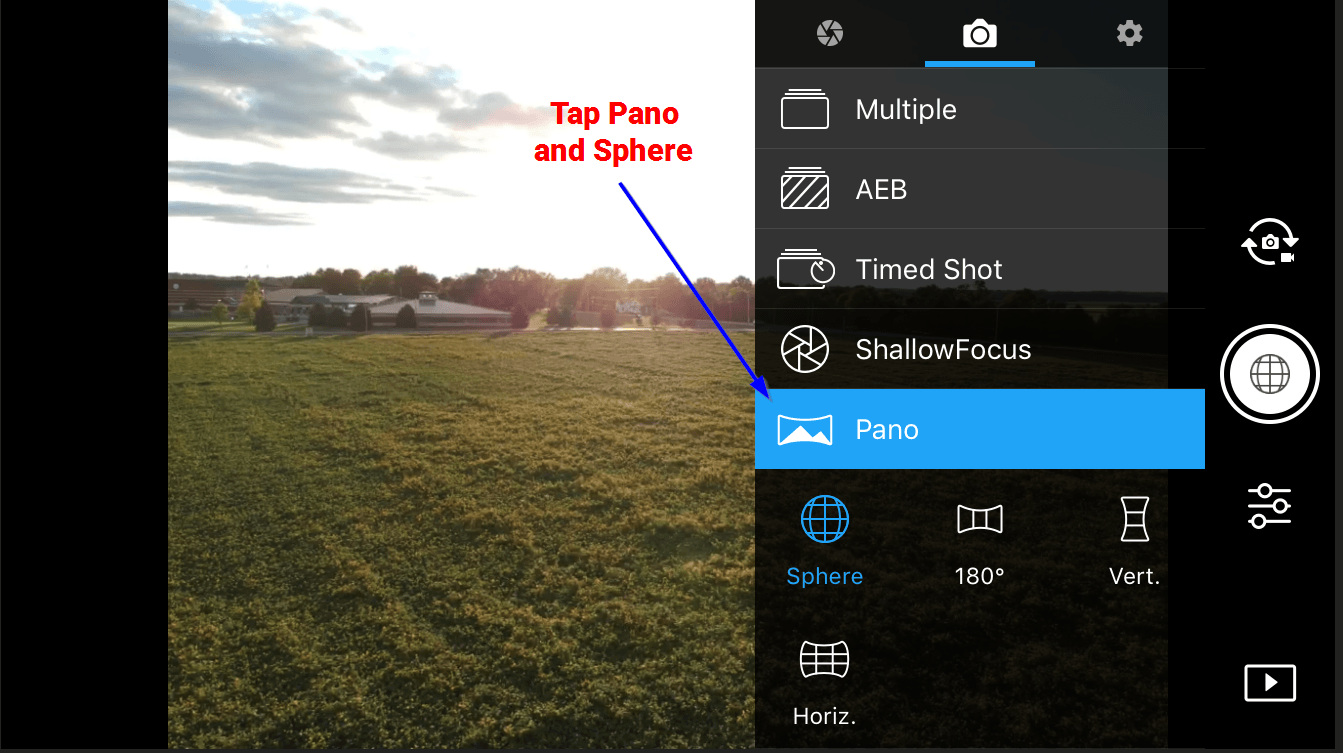
Now, select Pano and the sphere option is automatically highlighted. Sphere is what you want to select for the 360-image. The Sphere program begins when you press the sphere in the middle of the play button on the right.
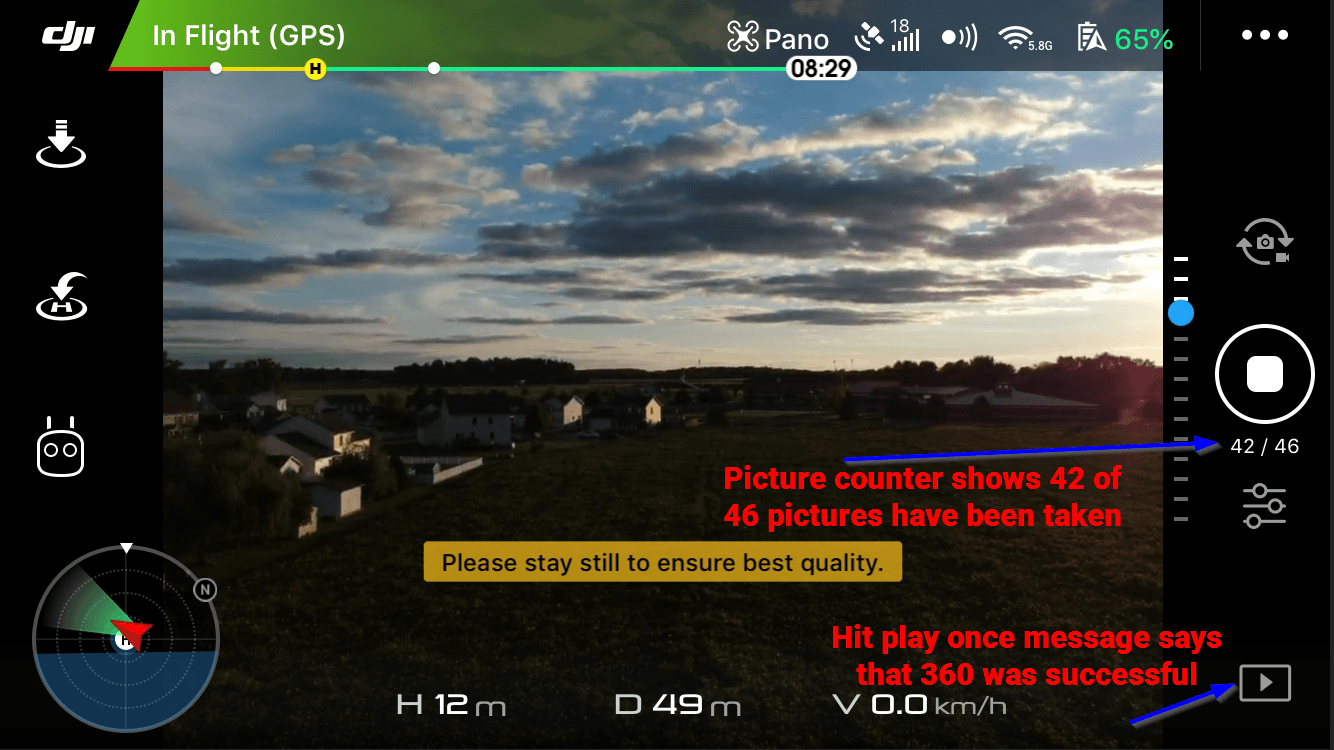
The drone takes over and you just need to make sure that the drones stays still. The Sphere program takes 46 pictures as it turns for 360 degrees around the landscape or area you selected. The counter on the right side of the screen tells you how many of the 46 images have been captured. Once the counter gets to 46, a message appears on the screen confirming that the program finished successfully. At this point, press the PLAY button on the bottom right.
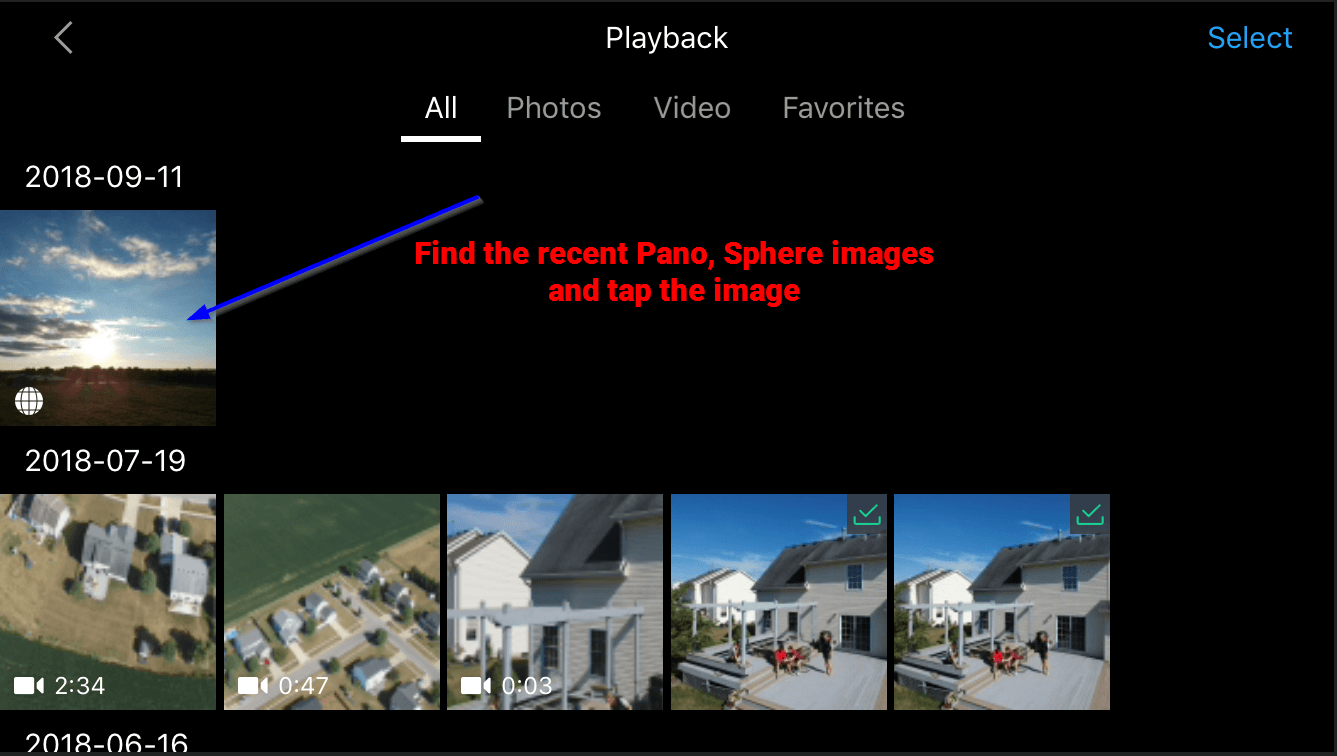
Now, the image shows with the Sphere icon on the bottom left. Make sure you select the most recent by tapping the image. This begins the stitching program of all 46 images into one final 360 image.
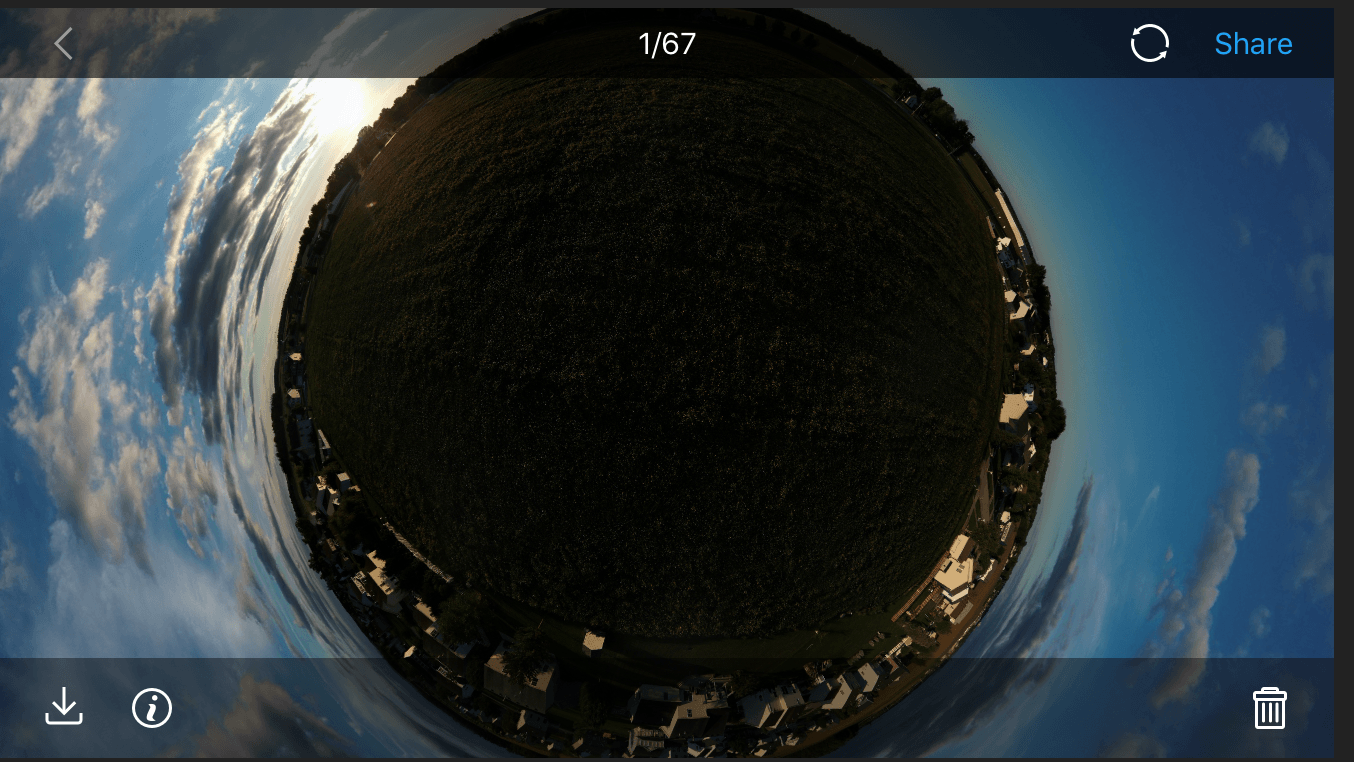
There is also a cool global image that is added.
It is nice because you can see each of the 46 images used to stitch together your 360-image, and if you want to use any of those as a regular photograph you can do that as well. Once the 360 image is finished, download the photo to your computer.
Uploading to the Oculus Go
- Add the image to the Oculus Go by plugging the charging cord into your computer. At the same time, you will need to use the headset and select the Allow Access option. The headset will show up on your computer.
- Drag and drop the 360 image you just captured with your drone into the pictures folder
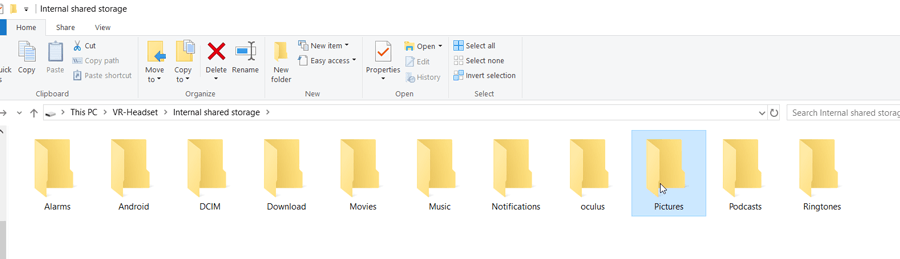 .
. - Put the headset on and point at Gallery. Then point to Internal Storage. A scroll wall with all your images will show up. Select the 360 you want to view.
- The image comes up on the screen in front of you. You need to point and click on the image and you will see a 2D, point and click on this and change it to 360.
- You will now be surrounded by the environment you captured with your drone.
Motion Controls Robotics has the perfect chance for you to see our facility and watch some videos using the Oculus Go virtual reality headset at our meetup in Chicago. Join us at Motor Row Brewing from 4-7pm on Tuesday, October 16, 2018.
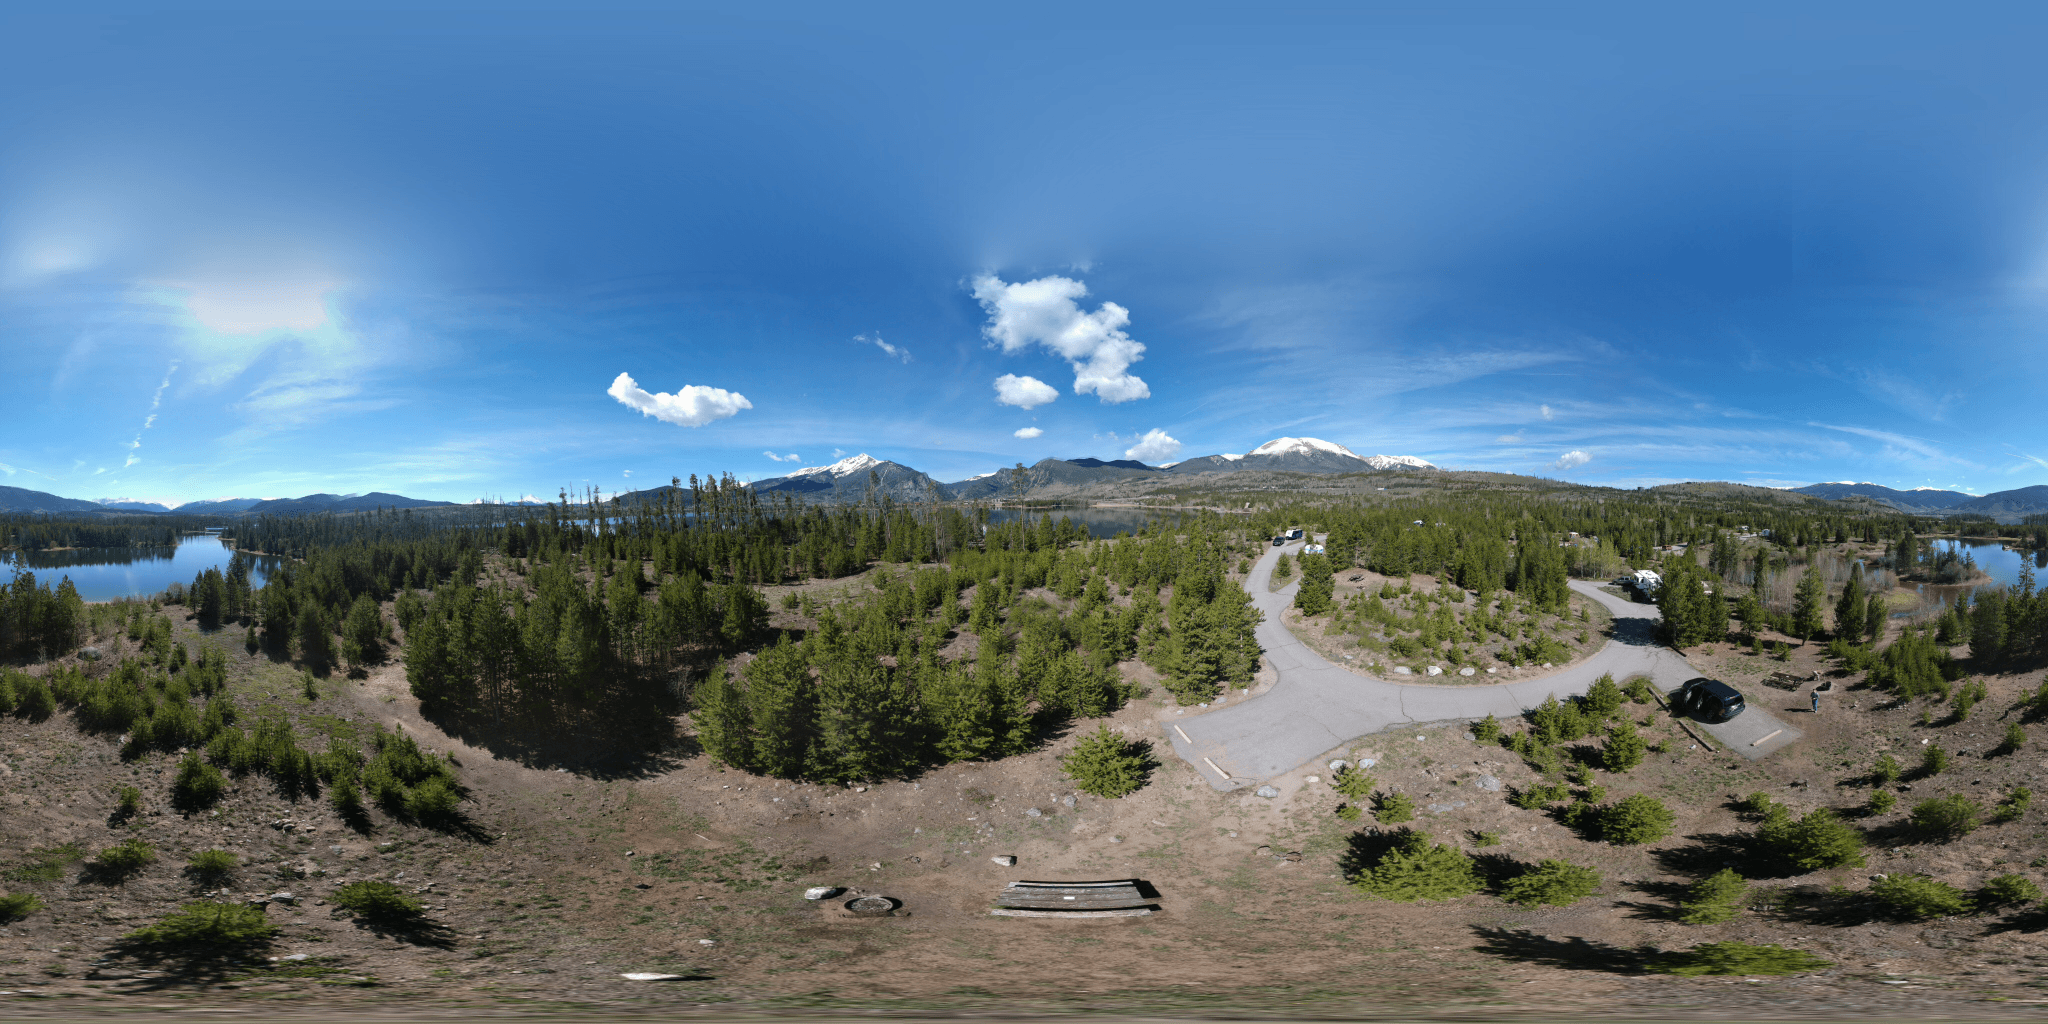
Examples of 360-Degree Images
Below are a few examples of 360 images that can be downloaded and sideloaded onto the Oculus Go for the full immersion of the landscape.